Installation and Project Setup
This section provides additional procedures related to Notification extension installation, project setup in Desigo CC. For background information, see reference section.
Enable Notification Application Rights
When you install or add the Notification extension, the application rights for Notification are disabled by default. You must complete this procedure to enable them and work with Notification.
- The Notification extension is added to the project.
- System Manager is in Engineering mode.
- In System Browser, select Management View.
- Select Project > System Settings > Security.
- In the Security tab, select the user group that you want to authorize to work with Notification.
- In the Application Rights expander, select the License check box.
- Open the Notification expander and select the check boxes for the rights you want to grant:
- Reno
- Reno Plus
NOTE: If the MNS app right is active in the projects which have V6.0 or older version than V6.0, while upgrading to 7.0, user have to manually activate RENO Plus app right to use RENO plus functionality. - Click Save.
- The selected application rights are enabled for this user group as shown in the table below:
User Interface | Reno | Reno Plus |
Basic Alerting |
|
|
Emails from reports | Y | Y |
Recipients management | Y | Y |
Support of Email, SMS, ESPA-Pager | Y | Y |
Trigger on events | Y | Y |
Trigger manually | Y | Y |
Monitor notification status | Y | Y |
One level escalation | Y | Y |
Easy buttons | Y | Y |
One trigger to send multiple notifications | Y | Y |
Notification folders | Y | Y |
Handling of special characters | Y | Y |
Double byte character support for SMS for non-Latin character. Language | Y | Y |
Validation support | Y | Y |
Import/export recipients | Y | Y |
Add attachments to Emails | Y | Y |
Active directory import or recipients | Y | Y |
Advanced Alerting |
|
|
Active or inactive recipients | - | Y |
Scheduler / Calendar for recipients | - | Y |
Recipient time zones | - | Y |
Multi-level escalation | - | Y |
Device-level escalation | - | Y |
Message optimization to avoid notification bursts | - | Y |
Advanced Message tailoring (scripts) | - | Y |
Support of IP Modems for SMS | Y | Y |
Cloud Service for SMS | - | Y |
Manually Archive the Notification Data
Perform the following procedure to archive data of closed incidents. Archives store operation data in an application-independent format for historical and auditing purposes. Due to the application-independent XML format, these data can be processed further with other tools.
- Select Applications > Notification.
- Select the Operation tab.
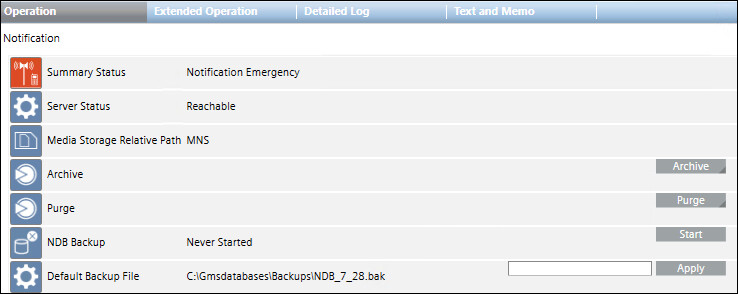
- Click Archive.
- The Destination, End Time and Start Time fields display.

- In the Destination field, enter a file system path as the destination for the storage of archived data.
- To add a value to the End Time field, do the following:
a. Select the end date of the archiving range from the calendar.
b. Enter the end time. - To add a value to the Start Time field, do the following:
a. Select the start date of the archiving range from the calendar.
b. Enter the start time.
NOTE: The closed incidents that were initiated between the selected Start Time and End Time will be archived. - Click Send.
- The data archiving for the specified time range starts and the message
Archive in progressdisplays.
- The message
Archive successfuldisplays on completion.
Manually Backup the Notification Database
This will create a Notification database backup at the assigned location. Perform the following procedure to backup the Notification database:
- Select Application> Notification.
- Select Operation tab.
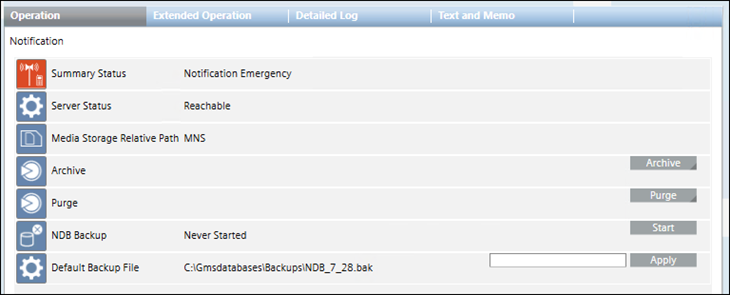
- (Optional) In the Default Backup File field, enter a new backup file name and click Apply. Type the path in one of the following two ways:
- To save locally: [drive]:\[myproject]\Backups\NDB.bak.
- To save on the network: \\[mycomputer]\bakups\NDB.bak.
- Click the Start button for NDB Backup command option.
- It will create Notification backup at the assigned location.
NOTE: Alternately, you can configure this command using macro and reaction.
Schedule the Automatic Archiving of Notification Data using Reactions
- Select Applications > Logics > Reactions.
- The Reactions Editor tab displays.
- From System Browser, drag the Notification node from Applications > Notification onto the Action expander of the Output expander.
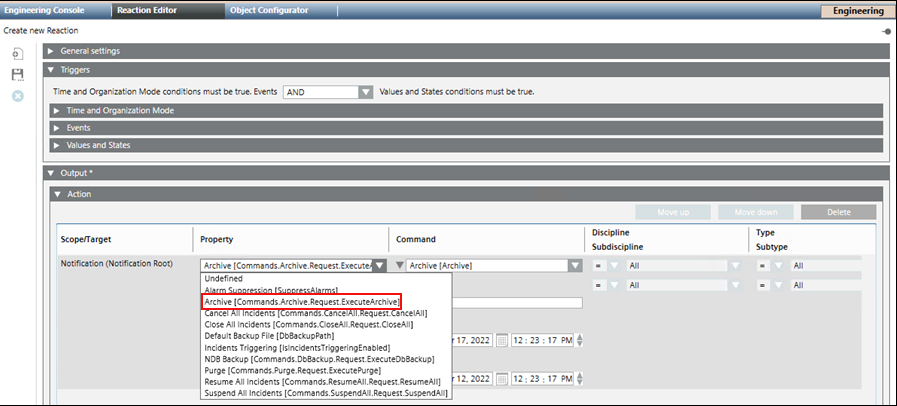
- From the Property drop-down list, select Archive [Commands.Archive.Request.ExecuteArchive].
- In the ArchiveDestination field, enter a file system path as the destination for the storage of archived data.
- Under ArchiveEndTime, do the following:
a. Select the end date of the archiving range from the calendar.
b. Enter the end time. - Under ArchiveStartTime, do the following:
a. Select the start date of the archiving range from the calendar.
b. Enter the start time.
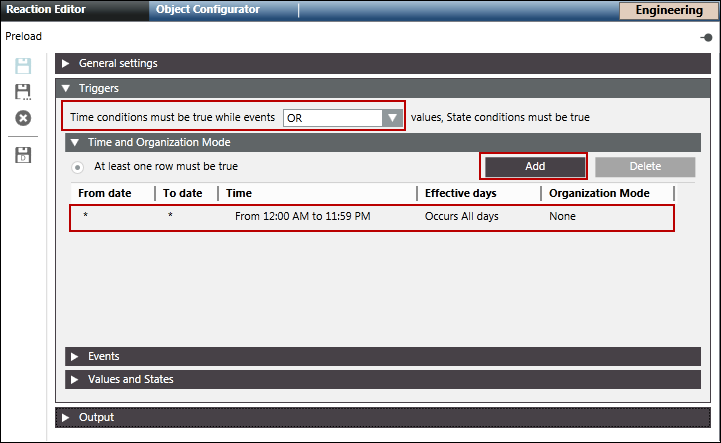
NOTE: The closed incidents that were initiated between the selected ArchiveStartTime and ArchiveEndTime will be archived. - Open the Triggers expander, change the Time condition to OR.
- Open the Time and Organization Mode expander, click Add to add a new time row and leave all default values, or enter a time or schedule that periodically triggers the Reaction.
- Click Save As
 .
. - The Save Object As dialog box displays.
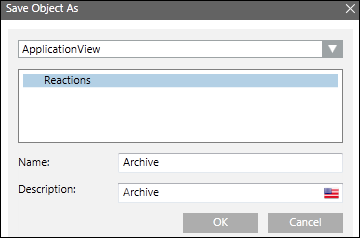
- Select Reactions and enter the name as archive.
- Click OK.
Manually Purge the Notification Data
Purging is the process of deleting operations data that is no longer actively used from a system, to reduce resource consumption and maintain system performance.
Typically, operating procedures mandate an archive operation before a purge operation to avoid any data loss.
Do the following procedure to purge data from closed incidents (closed incidents cannot have any active notifications).
- Select Applications > Notification.
- Select the Operation tab.
- Click Purge.
- The EndTime and StartTime fields displays.

- To add EndTime, do the following:
a. Select the end date of the purging range from the calendar.
b. Enter the end time. - To add StartTime, do the following:
a. Select the start date of the purging range from the calendar.
b. Enter the start time.
NOTE: The closed incidents that were archived and initiated between the selected StartTime and EndTime will be purged. - Click Send.
- The data purging for the specified time range starts and the message
Purge in progressdisplays. Once completed, the messagePurge successfuldisplays.
Schedule the Automatic Purging of Notification Data using Reactions
- Select Applications > Logics > Reactions.
- The Reactions Editor tab displays.
- Drag and drop the Notification node from Applications > Notification on the Action expander of the Output expander.
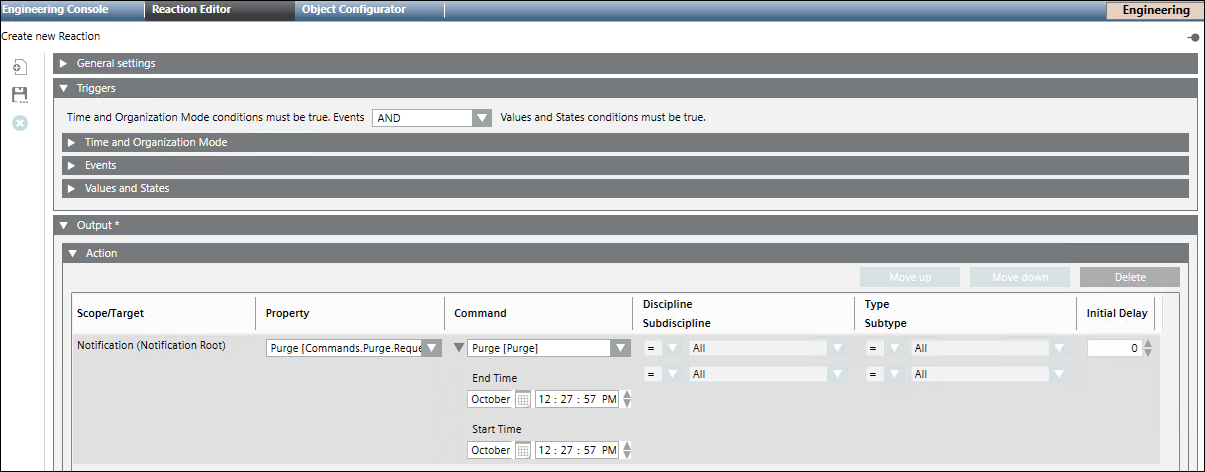
- Select Purge [Commands.Purge.Request.ExecutePurge] from the Property drop-down list.
- Under PurgeEndTime, do the following:
a. Select the end date of the purging range from the calendar.
b. Enter the end time. - Under PurgeStartTime, do the following:
a. Select the start date of the purging range from the calendar.
b. Enter the start time.
NOTE: The closed incidents that were archived and initiated between the selected PurgeStartTime and PurgeEndTime will be purged. - Open the Triggers expander.
- Change the Time condition to OR.
- Open the Time and Organization Mode expander.
- Click Add to add a new time row and leave all default values, or enter a time or schedule that periodically triggers the Reaction.
- Click Save As .
- The Save Object As dialog box displays.

- Select Reactions and enter the name as Purge.
- Click OK.