Configure or Edit an Alarm Table
Once you have an alarm table that you can work on at your customization level, you can define classes of alarms or edit existing ones.
Define Alarm Classes
- An alarm table is available at your allowed customization level. See Create an Empty Alarm Table or Copy an Alarm Table with Save As.
- Select the alarm table you want to modify or configure. For example,
Project > System Settings > Libraries > [L4-Project] > BA > Device > BACnet > Alarm Tables > [alarm table]. - In the Object Configurator tab, open the Alarm Configuration expander.
- Any alarm classes already configured for this table display in the list. Each one displays on a separate row, with the settings defined along the columns.
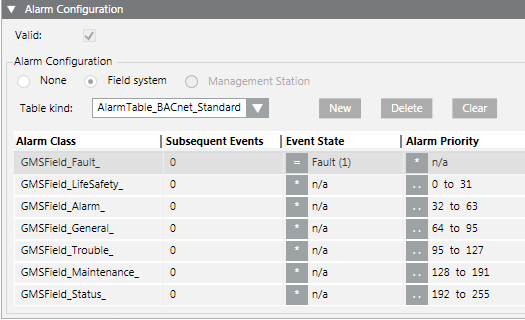
- Use the following buttons to add or remove alarm classes: click
- New: Create a new alarm class. An empty row is added to the list.
- Delete: Remove the currently selected alarm class row from the list.
- Clear: Delete all the alarm classes from the list. Empties the entire alarm table.
- To modify or configure an alarm class, click in a table column to change the corresponding setting. For example, Alarm Class, or Skip alarm generation. See below for the meaning of the operands.
- Click Save
 .
.

A newly created alarm table can now be assigned to an object model.
Existing alarm tables are automatically updated at the object model. You must first stop and restart the subsystem driver for the edited table to take effect.
Supported Operands | ||
Operand | Meaning | Example |
| | | Or |
|
!| | | Nor |
|
.. | In the range of two values |
|
!.. | Not in the range of two values |
|
> | Greater than |
|
< | Less than |
|
>= | Greater than or equal to |
|
<= | Less than or equal to |
|


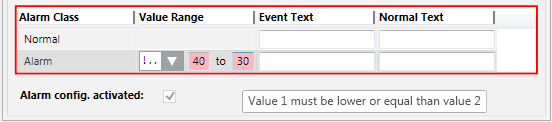
Fault indication
- The first value must be less than the second value. A valid value must be less than or equal to 30.
- The value sequence is not ascending. A valid value must be less than 50.