Adding a Damper
In Desigo CC, there are default dampers for all geographic directions, or a re-circulating damper symbol for recirculating air mode. After adding the graphic, the default damper can be rotated as per project requirements.
- In the Mode group, conduct one of the following actions:
- Click Design
 . Previously rotated objects appear in the default direction.
 - (Optional) Click Test
 . In this case, the damper does not display in its true size.
 - In System Browser, select logical view.
- Select Logical > [Network name] \...\ [Plant] >
- [DmpMx (re-circulated air damper)] as 3 damper symbols
- [Dmp (damper)] > [DmpSu (supply air damper)]
- [Dmp (damper)] > [DmpOa (outside air damper)]
- [Dmp (damper)] > [DmpEh (exhaust air damper)]
- [Dmp (damper)] > [DmpEx (extract air damper)]
- [Dmp (damper)] > [ByDmp (bypass damper)]
- [Dmp (damper)] > [DmpMx (mixed air damper)]
- [Dmp (damper)] > [DmpRc (re-circulated air damper)]
- And others
- Drag the object to the graphics page.
- The added object is displayed in its true size
 .
.
Rotating
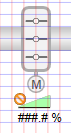
- The damper symbol is added to the graphic.
- In the Mode group, click Test .
- The damper symbol displays as per imported data points (analog or digital) in the default direction.
- Select the damper symbol.
- Left-click and hold, then right-click until the damper symbol displays in the desired direction.
- Release the left mouse button.
- The damper symbol is displayed in the desired direction.

NOTE:
The re-circulated air damper symbol with 3-damper symbols cannot be rotated.